Today I have an easy peasy Christmas project for you. I am Mondays Hostess today over at Digital Delights, I must say I was really nervous about this task. I was not sure what I was going to show case. Then I remembered this easy project & thought that it would be PERFECT.
This post is picture heavy, BUT, you will understand why as you read through x
I do hope you find this inspirational & hope you make one too. If you do I would love to see it.
Here goes .................
Equipment/resources you will need
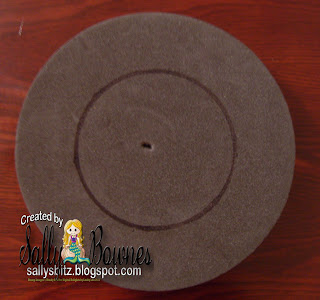
I would normally use polystyrene BUT this is all I could find. It's sturdy foam & works perfectly.
Two different coloured pieces of fabric.
A circular shape to draw around.
A pokey tool or cocktail stick.
You will also need some ribbon.
HERE IS WHAT YOU HAVE TO DO
Place the circular shape as even as you can in the centre of the foam shape & draw around it.
Cut a few lengths of the fabric into squares (they do not have to be perfect).
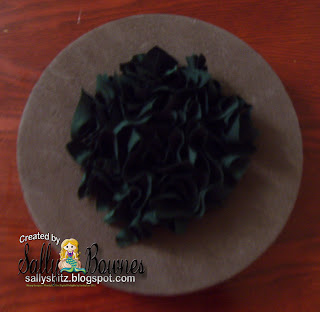
Using your pokey tool or cocktail stick, place it in the centre of the square fabric & push into the foam shape. You will feel if it is firm enough. If you need to push it in some more (you cannot go wrong)
Continue with this sequence until the circle you have drawn on the foam is filled in.
Now repeat the above using your 2nd coloured piece of fabric. Fill in the outer circle.
Now you need to add some ribbon round the rim. Mine is recycled from a prezzie & I used tacky glue to attach it.
You need to add another piece of ribbon to the back of the wreath. This is so you can hang it on your street door. You can use the same ribbon as you use on the rim, its totally your own preference.
I used Sugar Plum by Digital Delights to add to the centre of my wreath. You can purchase her HERE.
I used Promarkers & Sakura jelly roll pens to colour her.
I also mounted her onto a Spellbinders scalloped circle, cut out with silver mirror board.
I attached using pinflair glue, because it has to be sturdy for all types of weather!!
(You can of course attach anything you desire. Use your creative imagination)
This is my finished wreath.
Neighbours & passers by thought I had gone totally MAD. I banged a small pin into my door so I could hang the wreath to take a photo. This was at the end of September @ 7am Lol
I shall be entering this into the following challenges
One Stitch At A Time #83 'anything goes'
Stampin Sisters In Christ 'anything goes'
One Stop Craft #152 'anything goes'
Crafts And Me #55 'Use a digi'
Paper Take Weekly 'anything goes'
Crafty Cardmakers #53 'anything goes'
I really do hope I have inspired you today.
I look forward to your comments & if you make a wreath I would really love to see it x
Luv n hugs sally x


wow fabulous tutorial and superb wreath, love it totally
ReplyDeleteHugs Kate xx
good luck in my candy draw :)
oh hun this is just brilliant gosh really love what you have created here it look so effective hugs cherylxx
ReplyDeleteOh very pretty...Like it...Well done..
ReplyDeleteCaz xx
this is gorgeous sally.i love the effect of the ruched fabric and adorable image :D
ReplyDeletexx coops xx
WOWZER!!!! Sally, that wreath is fantastic!! What a gorgeous creation!! So clever too!!! Your tutorial was very brilliant and easy to follow along! Thanks so much for sharing this with us!!! Have a great week hun!! HUGS
ReplyDeleteThis is stunning, such a beautiful idea, thanks for sharing your technique
ReplyDeleteLindsay xx
YJ This is gorgeous so grateful for you sharing xxxx
ReplyDeleteLove your project Sally really beautiful. Thanks for entering my candy too. I also love Ally Pally,I read this in your comments, I went this year with a friend it was great.
ReplyDeleteWe go to the Royal Marsden in Chelsea and the London Clinic too, sorry to hear about your dad, but we do stay strong this end. Speak soon take care.
Hugs Linda
what a fantastic tutorial Sally, so clear and understandable...fantastic idea too...thanks for joining in with the Crafts and Me challenge
ReplyDeleteMina xxx
ohhhh wow!
ReplyDeleteWhat an utterly stunning creation! Thanks you for all the instruction too!
I adore th wee image in the centre, just finishes it off nicely!
Thanks for joining in the fun this time at Crafty Cardmakers!
Hugs Melly xxx
oh très sympa. biz
ReplyDeleteWow what a fab creation and thanks for sharing the tip, this is really nice, thanks for sharing with us at OSAAT, good luck and hope to see you again, Gaynor :)
ReplyDeleteSuch a beautiful creation !
ReplyDeleteThanks for sharing with us at One Stitch At A Time for our, 'Anything Goes' challenge.
Good Luck !!
Hope to see you back next week :O)
Choccy x